Six Steps to a Site Page for HCAC
This guide will assist you, the HBCU partner institution, in creating both external and internal site pages. These sites pages will provide a space for you to highlight and give more detailed information about things, people, places or events featured in your collections. It shows a process for creating a site page using the creation of this page. There are six steps outlined below. While this guide is meant to help you in the beginning to create these pages by providing a process, as you continue to create site pages, you will find a system that works best for you.
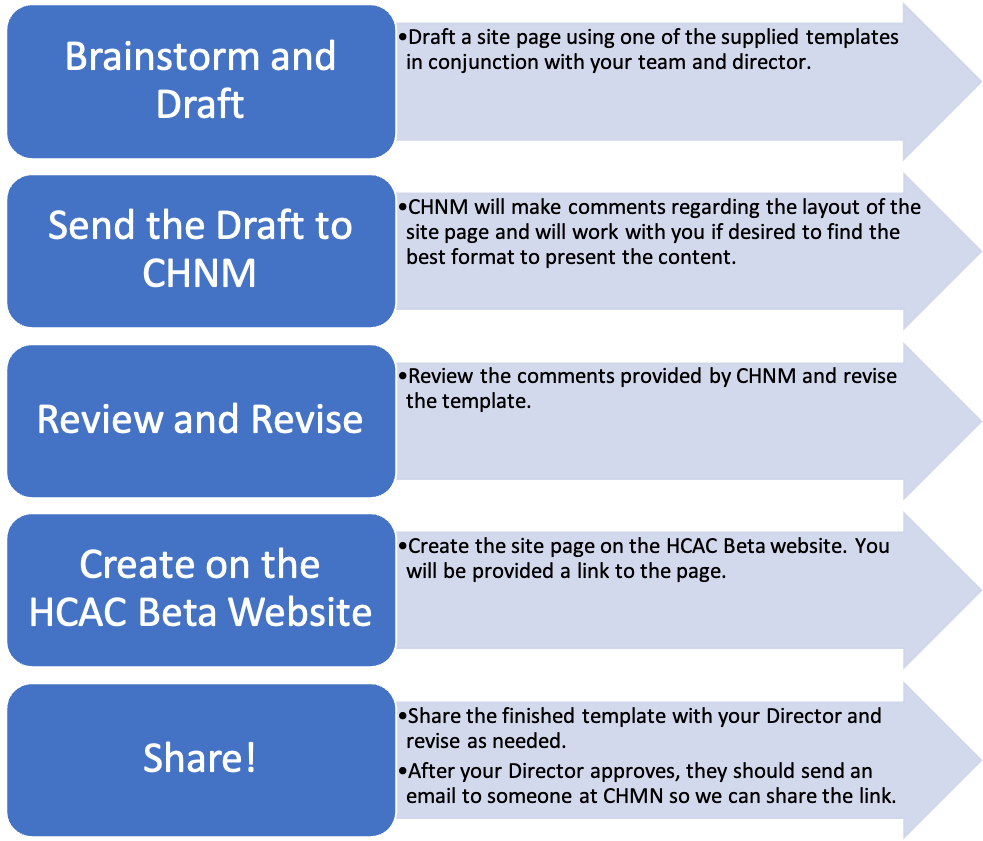
Focus on creating the first two or three external site pages, using the guidelines highlighted in the graphic to the right. External site pages will be linked and visible in the front end of the website. Internal site pages will only be accessible through the metadata. You are only required to complete two to three external site pages as a part of the project, you are not required to create any internal site page unless you have discussed it with your director and would like to. The process of approval with CHNM outlined in not required beyond those first external site pages if you choose to create more. For example, for those additional site pages you do not have to use the provided templates or send anything to CHNM while creating them. You can work out your own process for creating additional pages with your director.
Table of Content:
- Step 1: Choose a Topic
- Step 2: Brainstorm and Research
- Step 3: Draft
- Step 4: Input into the Template
- Step 5: Input into the Web Template
- Step 6: Revise and Link
- What's Next

Think of these pages as supplements to your collections, and your collections as supplements to these pages. These pages can help users understand your collections, but your collections can also enrich users understanding of a certain topic in a way only your institution can. They can provide additional information about the collections, provide information about a topic, connect items together, help users understand some aspect about your collections, or highlight a theme represented in your collections.
Consider some of the following questions:
- What topics in your collections need additional explanation? What content can help users understand something about the collections?
- Do you have the materials to represent this topic? Do you have items from your collections that you can tie in to tell this story?
After choosing a topic, consult your director. Make sure you have your director's approval on the proposed topic before moving onto the next step.
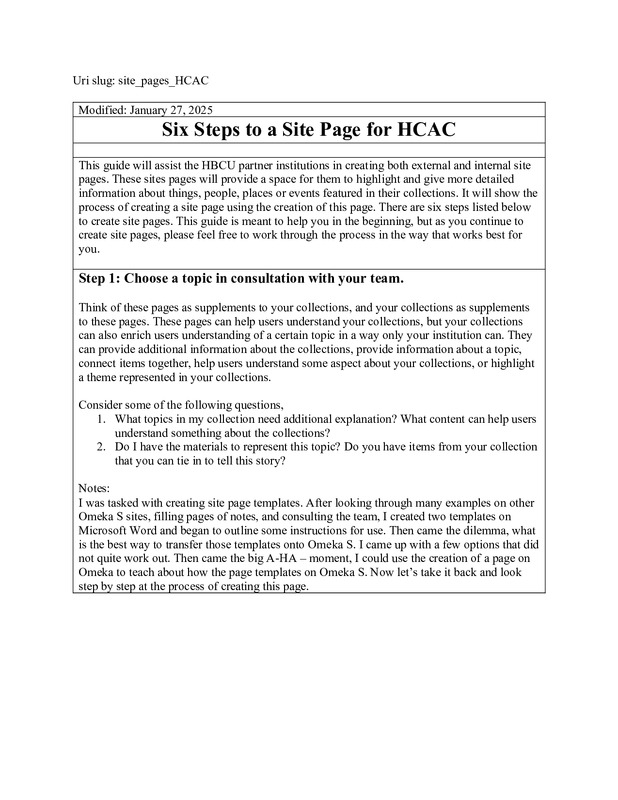
What you are seeing now is a site page created using the process discussed on the page. Here is the Timmia's Proccess for creating this site page.
Timmia was given the task of creating site page templates. After looking through many examples on other Omeka S sites, filling pages of notes, and consulting the team at CHNM, she created two templates on Microsoft Word and began to outline some instructions for use. Then came the dilemma, what is the best way to transfer those word templates onto Omeka S. She came up with a few ideas that did not quite work out, then came the big A-HA – moment, she could use the creation of a page on Omeka to teach about how to use those page templates. From there it spiraled into a whole guide on creating site pages. Now let’s take it back and look at her step by step process for creating this page.
Step 2: Brainstorm and Research
What template works best for the topic?
Review the resources presented during the June 2024 Convening such as “Caring for Community in Black Digital Public Humanities” and the "Site Page Construction Reference Guide." Building on these resources you can also consider, if it is helpful, the purposes of these pages. Do you primarily want to inform, persuade, describe, or tell a story. From there you can consider what types of resources you will need to fulfill that purpose. Some of these purposes are better represented using certain layouts, but the way you choose to represent the content - primarily through text or primarily through images - can also influence your choice. The following template, created by CHNM, are two layouts for site pages. They represent only two possibilities for formating a page. They are really only a starting point to help you as you begin to create site pages. They will help you consider what types of elements are on a page and brainstorm how you might want to place them on the page. The final page on the Omeka S website, will probably look different from what you intially layed out. If you are already familiar with the functionalities of a site page, you do not have to use the web templates on the Omeka S HCAC Beta Site . Once the Word template has been approved, you can transfer the content onto the HCAC Beta Site on your own.
Simple-Page Template
The purpose of this template is to provide the space for writing about one, item, item set, collection or a topic. It is not meant to accommodate complex narratives of topics. For example, you might use this page to provide more information about an art piece in your collection or write about an event or a project that is connected to many items in your collection that does not necessarily need pages of informational text.
Here are some examples:
- https://exhibitions.psu.edu/s/african-brilliance/page/joseph-vandy-sengeh - The media is the star of the show and the (optional) accompanying text provides any additional information.
- https://www.edwinwashingtonproject.org/s/ewp/page/pay-equality - Although some type of media would have enhanced this page, it is still a good example of a page that provides a little more information about one topic.
- https://exhibits.lib.utah.edu/s/century-of-black-mormons/page/how-many - this does not exactly fit into the format provided for a simple page, but it is a good example of the use of graphics with a bit of accompanying text.
Multi-Page Template
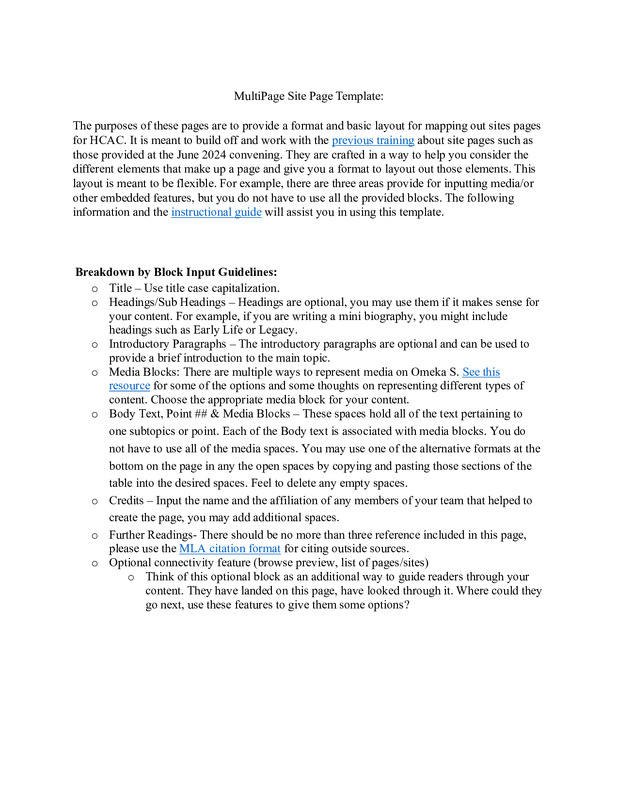
This template is meant to guide the presentation of more complex topics or to help you narrate a story about some aspect of your collection. For example, you might use this template to create a short biography on a person, write about an organization in your collection or connect multiple pieces of art in a collection. It is modeled after the format of an exhibit where one exhibit slide is one text-media block section on the template.
Here are some examples:
- https://explore.saltairecollection.org/s/p/page/exhibition-turning-wool-into-cloth - This page shows a process. On the page there is an introduction and conclusion and subpoints (steps of that process).
- https://exhibits.lib.utah.edu/s/this-abominable-slavery/page/welcome - This is in the format of an exhibit but imagine that each page was just one section of the page template. Each page (what would be in the multi-page template one text-media block section) focuses on an aspect of this topic.
- https://ibali.uct.ac.za/s/annsuttonarchive/page/index - This is being offered as an example because it fits the format and offers an example of a type of biography, but we caution against using it as is. We do not want that kind of long text site page on HCAC. You can use a site page to write a biography just add more media to break up the textual content.
How will you represent the topic?
- Consider what types of materials you might need to represent this topic. Look through your collections and gather those materials. Do you have enough information to create these pages.
- Also consider the best ways to represent the materials. Will you need to make infographics, charts or visualizations? What outside resources do you need? Is there anything you need to research more about. You will have to prepare this material outside of Omeka S and upload it using the appropriate format and process.
Use Case
You want to create a site page about an organization promentially featured in your collection. You think that this will help enhance the website visitors' understanding of the collection and your institution is uniquely positioned to provide this information because of your collections. You also have many items in your collection that can be featured throughout that page. You primarily want to describe to or inform the audience. This is probably a more complex narrative, with multiple parts, so the multi-page template works well for this topic. One section of the page can be about the organizations beginnings, another about some prominant members, and another highlighting a connection to your institution. Each of these sections could have media accompanying the text. Alternatively, you could also use the simple page template for this topic, for example, if instead of using mostly text, you choose to tell the story of this organization primarily through media files/graphics such as images with a bit of text scrolled through horizontally or a video.
Include your team and director in this brainstorming process. Reach a consensus about what to research and how to represent the topic before moving forward in the research process.
Timmia's Process:
There are many ways to brainstorm. I typically read a lot of sources and write notes or collect quotes from those sources which I then organize later. I do not always share these documents, but if I end up sharing, I will try to go through and organize the content a bit better. Attached is the research I did prior to creating the site page templates with all of its spelling and grammer mistakes. I drew some of the sources to create this page from that document. You might also engage in a more collaborative less textual form of brainstorming or something similar to what was done during the June 2024 training or create something like an idea cluster.
The purpose of my page is to inform – I think I would be better able to present the information on the multi-page template as I am detailing a process with multiple steps. I also prefer to make the presentation of this topic more textual. Each of those steps can act as one subpoint or section of the template. Much of the media used throughout the page will be documents or examples that illustrate the steps. I will probably need to create a few of those documents, other site pages and some videos to demonstrate the steps of creating a page. If they are word documents they will have to be converted to PDF to display on the page.
![Notes for Template Pages [Working Document]](https://hcactraining.org/files/large/b541a60ac1bd016496e157dc3db23a95a240c41c.jpg)
Step 3: Draft
Decide on your main points and what media connects to those main points. Draft out the written content of your pages. In this stage also think about what resources connect to the different sections of your outline. If you are including graphs or images that need to be created, they should be made elsewhere and then imported as JPG, PNG, PDF or other compatabile formats onto Omeka S.
If it is helpful, you might create an outline of the page to help organize the content on the page. This outline can just be headings and subheadings at first but as you revise you can optionally add additional layers such as text, pictures and links. You may share this outline at any stage and ask for feedback. You might also try freewriting or organize your content visually on a white board or using some type of chart such as a flowchart. It is important to note, that what is on this page might not end up on the final version of the website, this is just a place to get started on writing out and organizing your ideas.
Timmia's Process:
This is one approach to drafting content for your page. Attached is the outline,Timmia created for this webpage. This is the final version of it, but in its earliest iterations all she had written down was some tentative titles, and bulleted points about the sub topic or topic sentences. As she continued to work on it, she filled out more sections of the outline, adding more bullet points for the subtopics and adding some text. She also divided up and color coded the content. She also began to make and modify some of the supplementary materials that are attached to this site page. For example, the outline below was created in word then saved as a PDF before it was uploaded to Omeka S.
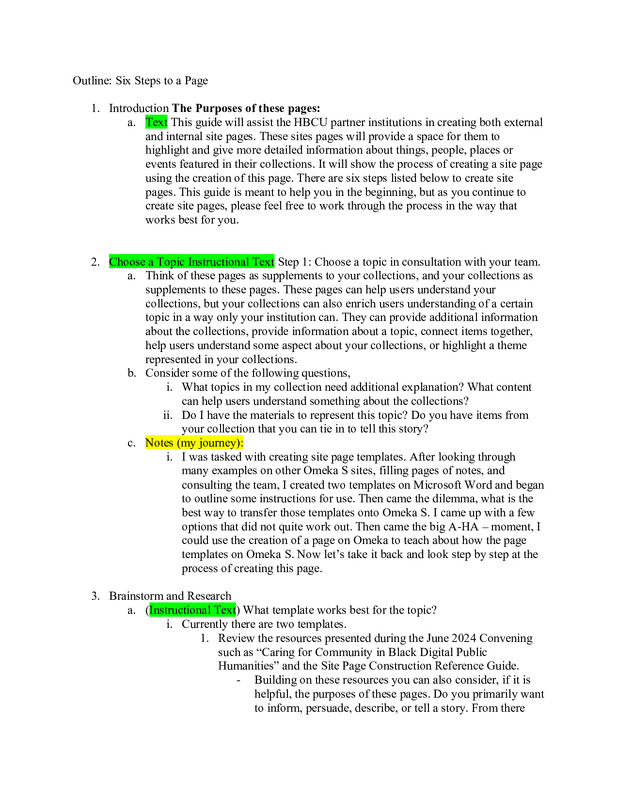
Example Outline- Six Steps to a Page
Now that you have gathered, and started to organize the visual and written content for the page, it is time to input it into the template. Download one of the two templates (links below the images) and use it to create the inital draft of your site page. Write your content in the spaces provided. You may also begin to think about the types of media blocks you would like to use to represent your media. See this page to learn more about the blocks, explore the Omeka S User Manual, or experiment with creating a page your institutions website on the hcactraining installation. Input the media or describe the media in the appropriate spaces. Optionally, after you have input all of your values you may work on formatting by removing empty blocks or removing the boarders from the table.
Share the template with your director and ask for feedback. Once you have revised and have gotten their approval to proceed, send the template to CHNM for additional feedback. CHNM will focus on the content. Once you have recieved this feedback and revised and are ready to move on to inputting the content into the web template, contact CHNM again and and they will send you a link to the web template created for you to modify if desired. Just a reminder, that after you get approval if you are already familiar with the functionalities of a site page, you do not have to use the web templates on Omeka S, you can create a new page and transfer the content onto the HCAC Beta site on your own. CHNM may also, depending on the need and time, provide additional recommendations for revisions to implement as you input into the web templates.
Timmia's Process:
Attached is the template that Timmia used to fill out this webpage. She downloaded the Multi-Page template onto her computer and then because her outline was very detailed she just transfered the content from her outline onto the template. She then modified the formatting a bit, and added the media she anticipated attaching to the site page. She choose not to insert the actual media into the blocks in all of the provided spaces but instead just provided some text about what media she would use and what type of page blocks she could use. If the media is on Omeka S you can put the HCAC identifier or the Omeka S ID number into those spaces.
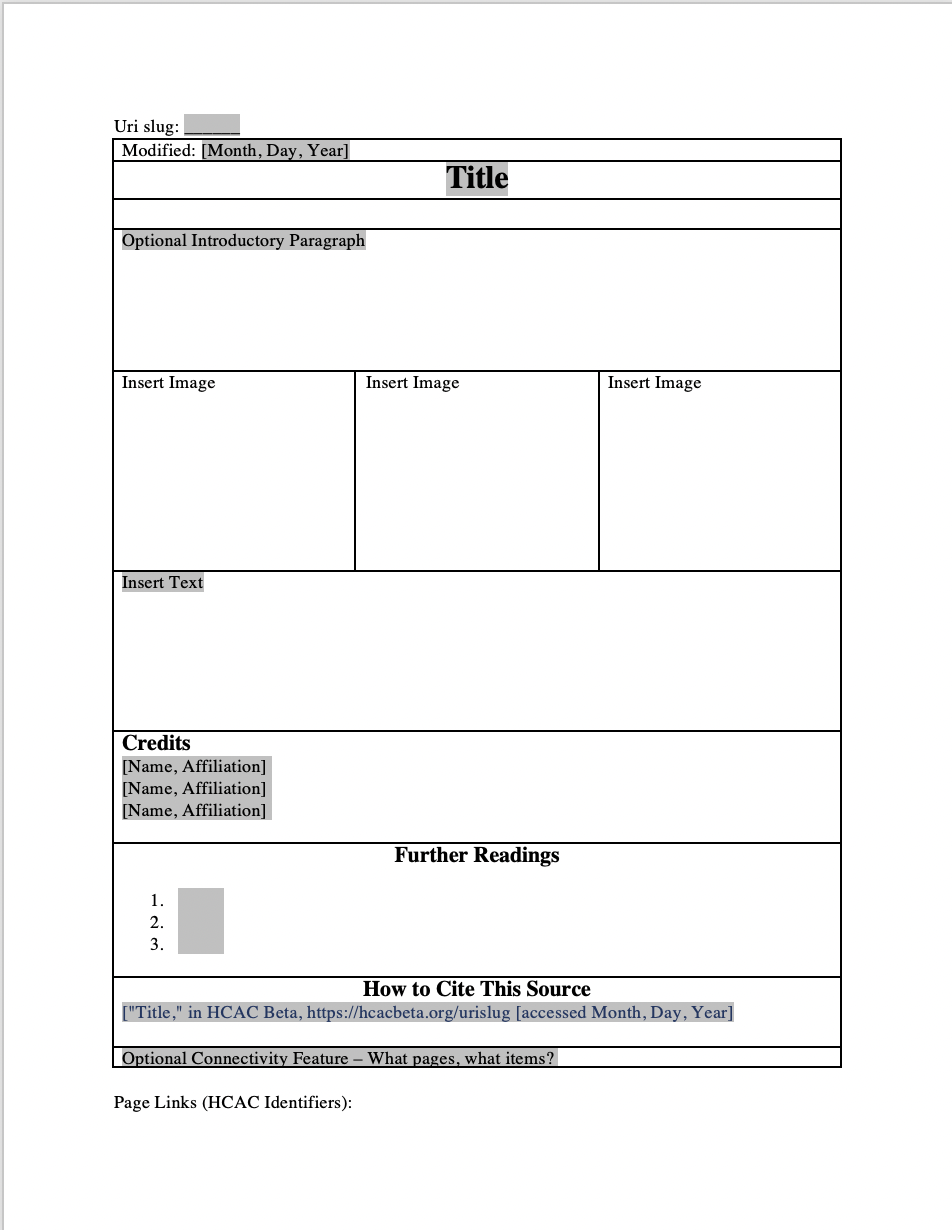
Template_MultiPage
The template to use for the Multi-Page Site Page Creation. Download the word version of the page template from the HCAC Google Drive.
Template_SimplePage
The template to use for the Simple Site Page Creation. Download the word version of the page template from the HCAC Google Drive.
Timmia's Example Template - "Six Steps to a Site Page for HCAC"
Timmia’s Sample Template used to create this training site page.
Step 5: Input into the Web Template
Copy and Paste the information from the word template to the provided link for the web template. In the beginning it might look at little bit messy, but as you continue to work on formatting it will come together. Contact CHNM if you need any help. Continue to refer to the page Page Blocks on Omeka S for more information on using the Page Blocks, particularly the section on the HTML Block. See the following video for a demonstration on inputting values into the web template. Ask for feedback as needed from your team and director. This process will look slightly different when creating internal site pages or additional external site pages, you can copy the template yourself as demonstrated in the video.
- The first part of the video is an introduction to the web templates and their layout.
- Around the 5:30, Timmia begins to demonstrate adding content onto the web template
- Around the 18:00 minute mark, Timmia begins to demonstrate some of the ways you can reformat the page.
Select Input Guidelines:
- If desired change the title and update the URL Slug to the site page.
- The first block group with the text [[Optional Introductory Text, Subheading] is for any introductory text that you have created [on the simple page template this is prior to the display of any media]. Delete the whole Block group if you did not create any introductory text. Erase the subheading if you did not include a subheading. Select, modify and add media blocks and multiple HTML blocks to the block group as desired.
- Each of following Text Block group follow the same format as the first one. As with the last text block you should delete and add page blocks and continue to adjust and reformat as needed.
- On the simple page template you may choose to add text to both or either of the text block groups.
- Delete any unused block groups.
- Add as many new block groups for text sections as you need to complete your site page, delete any text block groups you do not use.
- The next block group, after the text ones is an area for acknowledgements/credit, please use the space to acknowledge those who have contributed to the page using the provided format. Copy as many times as need.
- Use the following block to provide a list of further readings. There should be no more than 3 sources listed in this space. Use the MLA style – see this resource - for citing outside sources.
- Copy and paste your updated citation into the following block. You will have to update the title.
- The final optional block group is a place for all of the blocks that will help provide connections to other content on Omeka S. Delete the Block group if you did not use any of these options, feel free to modify as needed.
Tip: Sometimes when you are copying from a word processor such as Word, you are also copying all of formatting styles and pasting them into the HTML block. We recommend not copying that formatting. This can make the HTML source code a bit confusing and hard to modify. Additionally, the CSS for the website will provide that type of formatting. To copy text over without formatting using the short codes for a Mac is Shift + Command + V and for Windows is Ctrl + Shift + V.
Step 6: Revise and Link
You will probably have to go through several rounds of revisions before you are finished with your site page to prefect the content and the format. Ask for feedback! The page you are currently on is a intensely revised version of the page created in Step 5. It was looked over by the team at CHNM multiple times before being presented to you. For example, after looking over the page Timmia realized that it would be helpful to include a Table of Content at the beginning of the page. After consulting the team, she added some more media files to the page and took a few others away.
Finally, if desired, add and update all page links. If this is an internal site page make sure to link the page to all the appropriate items' metadata. The page should be linked in the relation property.
Once you are happy with the site page, share it will your director. When your director is ready, they should send a message to someone at CHNM to let them know the page is ready to be included in the project.
 Congratulations you made it through the training!
Designed by starline / Freepik
We have no limits or expectations for the number of internal pages created, but we would like you to create two to three external site pages. External site pages will be linked and visible in the front end of the website. Internal site pages will only be accessible through the metadata. To the right is graphic showing the process for completing your first site page.
A reminder, in general, while creating these first couple external site pages, CHNM is expecting you to reach out at least twice, the first time in Step 4 for revisions, and the second time after you have done those revisions, at which point, depending on the need and time, their might be more recommended more revisions.
Please let CHNM know about any addtional site pages you have created for the project. We want to know they exist and might be able to offer some recommendations. While you do not have to follow the process outlined while creating any additional site pages beyond the first external two or three, feel free to reach out at any time while creating them.
The resources and media used throughout this guide are found in google drive which is linked in the section Further Readings.
Please let us know if there are any questions moving forward!
Credits
Timmia King, Graduate Research Assistant for the HCAC Project at the Roy Rosenzweig Center for History and New Media at George Mason University
How to Cite This Source
"Six Steps to a Site Page for HCAC," in HCAC Training Site https://hcactraining.org/s/main/page/site_pages_HCAC [accessed Month, Day, Year]
![Notes for Template Pages [Working Document]](https://hcactraining.org/files/medium/b541a60ac1bd016496e157dc3db23a95a240c41c.jpg)